
Documentation
Walk the new All API Deck workflow from key vault to proxy guard.
This guide follows daily use: install the desktop app, sync and test API keys, inspect sessions and toolchain state, configure the advanced proxy, then enable the prompt-injection guard and mini floating when needed.
Quick start
Download the right build from GitHub Releases. Windows has the most complete experience; sidebar, mini floating, floating windows, and some client takeover flows are verified there first.
- Download and launch the desktop app.
- Open the key vault, then import or sync site records and API keys.
- Run quick checks by group, model, and status to confirm usable providers.
- Open Advanced Proxy and hand stable providers to Codex, Claude, OpenCode, or OpenClaw.
- Enable the guard and mini floating when you need request visibility.
Synced key vault
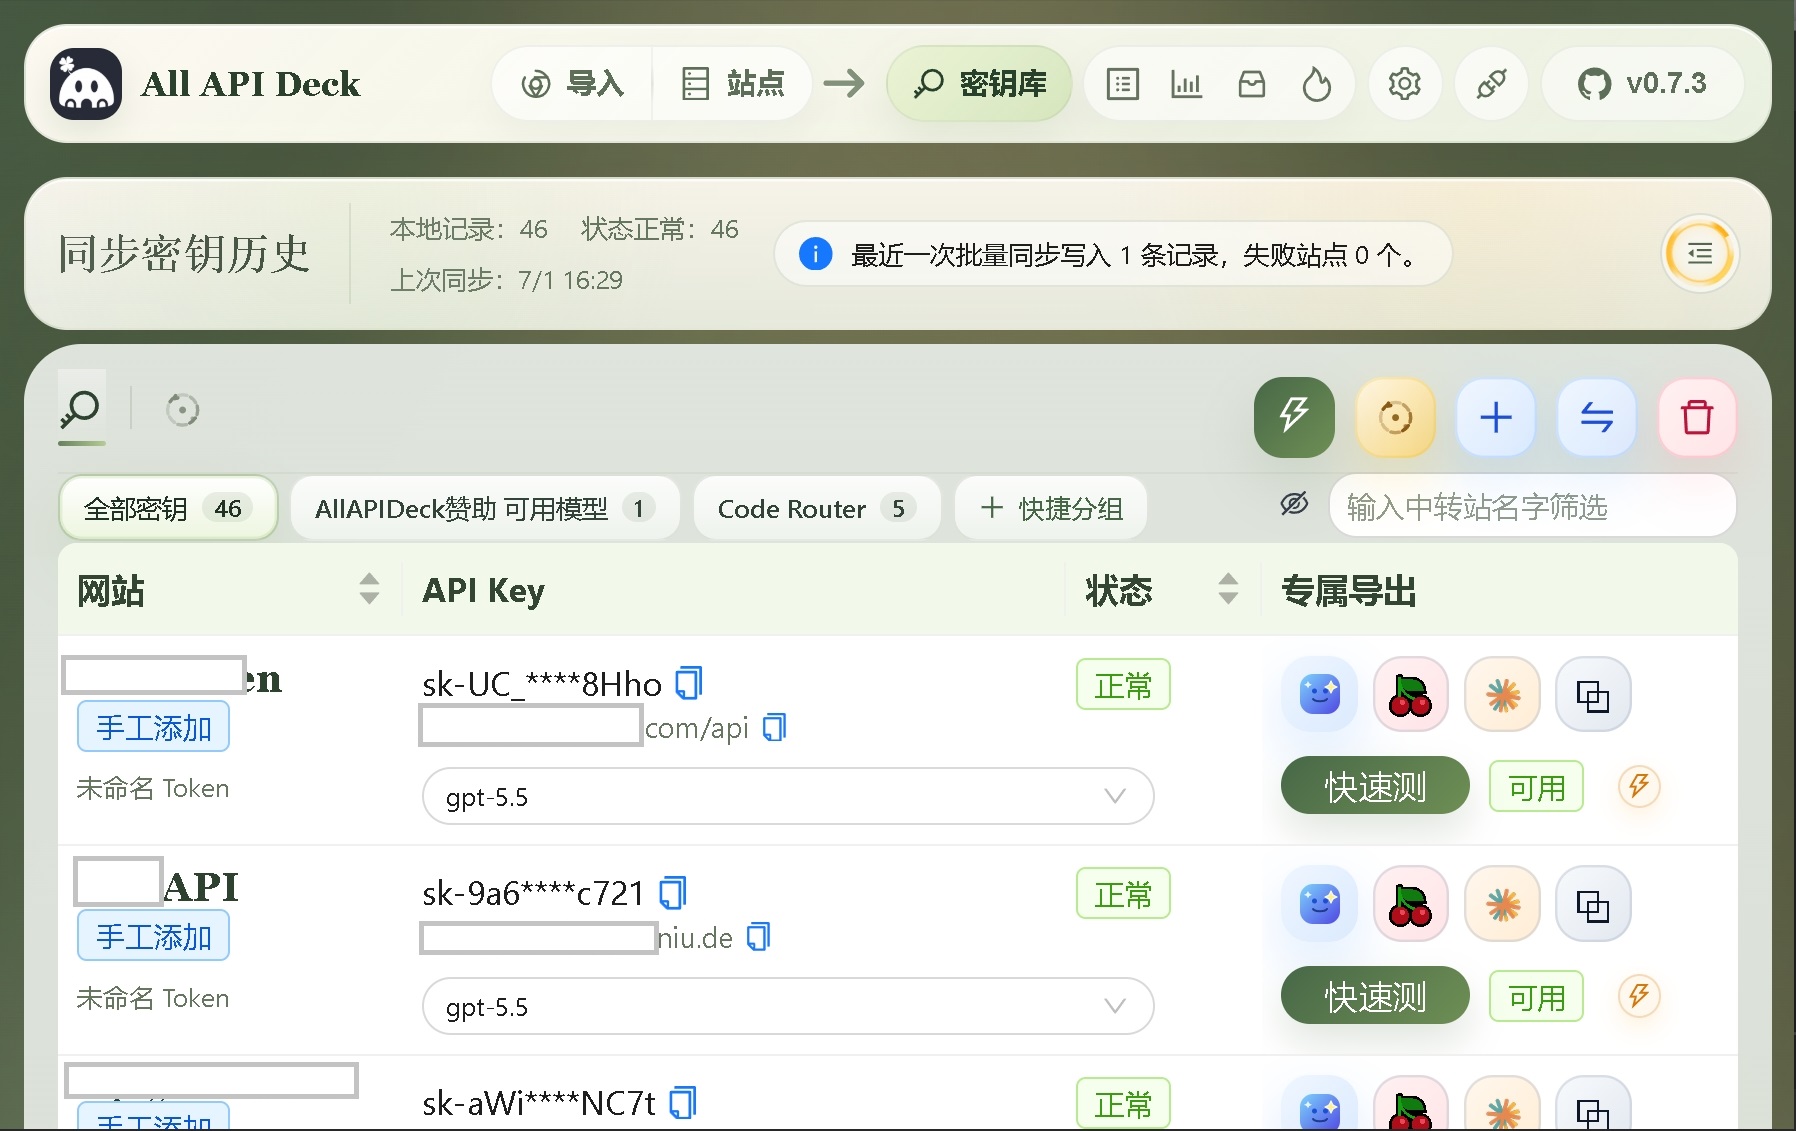
The key vault is the new main workspace. The header shows local record count, healthy count, last sync time, and the latest batch sync result. Records are organized by site, API key, status, and dedicated export actions.
Common actions
- Filter records by all keys, project groups, or quick groups.
- Filter quickly by relay site name.
- Run quick live checks for one key, and copy the key or base URL.
- Export usable records to target clients with dedicated buttons.
Sessions, MCP, and Skill
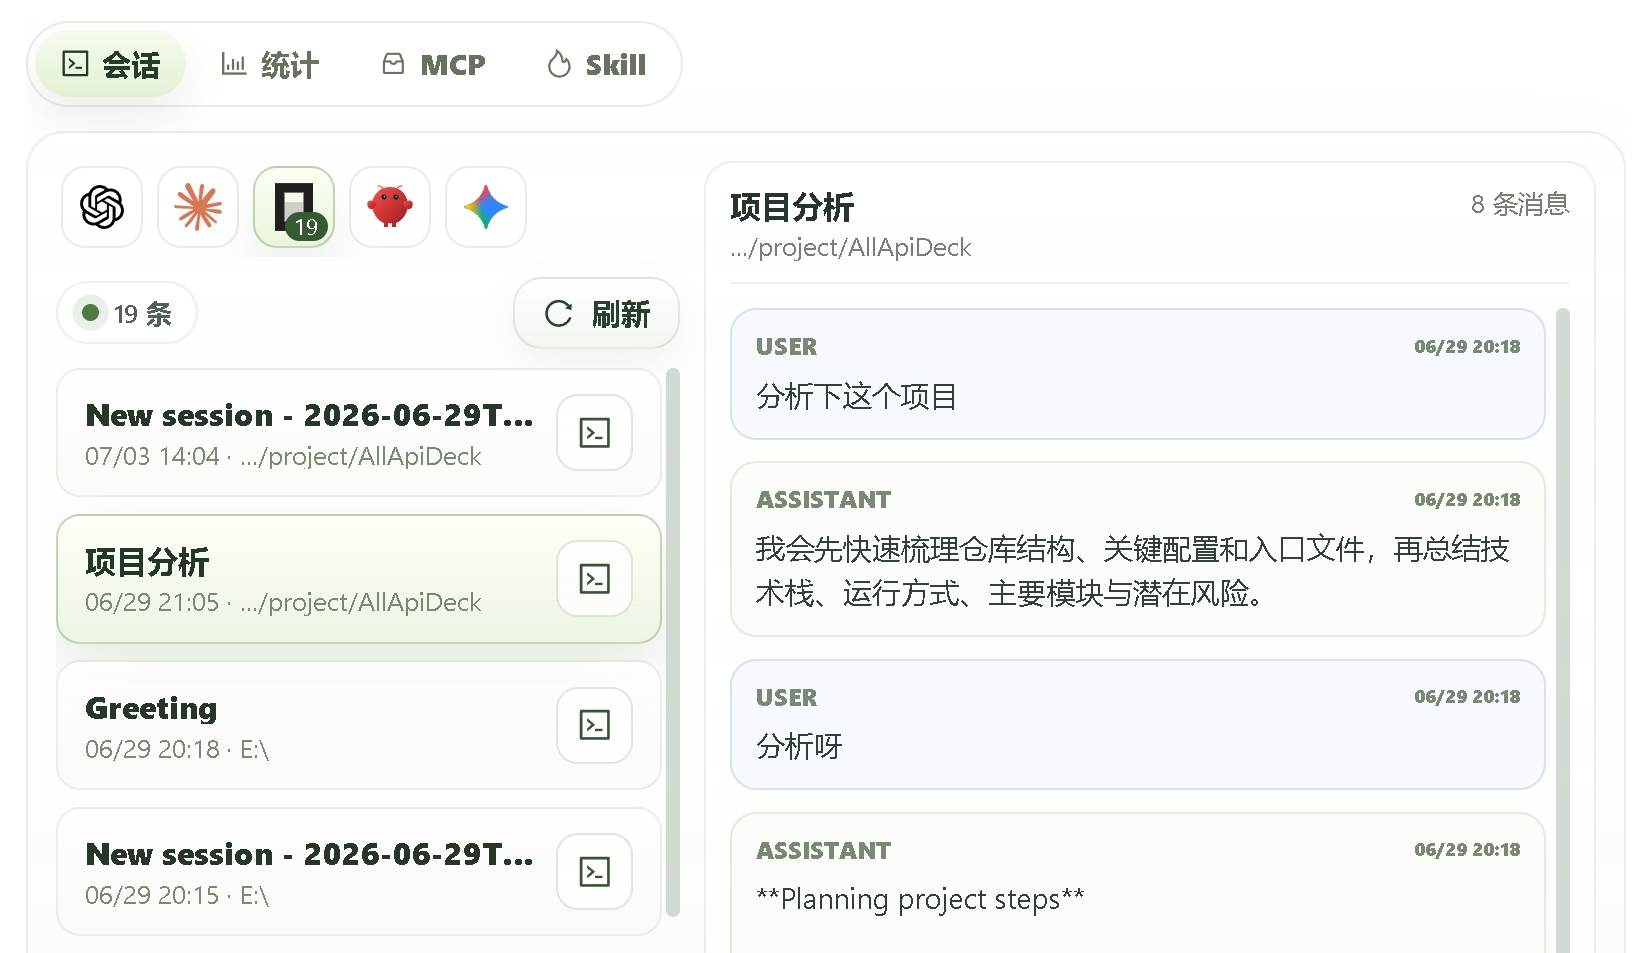
The new session view puts project sessions from different clients in one place. The left side lists sessions and entry icons, while the right side shows message history. The top tabs also switch to stats, MCP, and Skill.
- Find historical sessions by project path and time.
- Inspect user and assistant messages to recover task context.
- Observe MCP and Skill state without switching across several tools.
Advanced proxy takeover
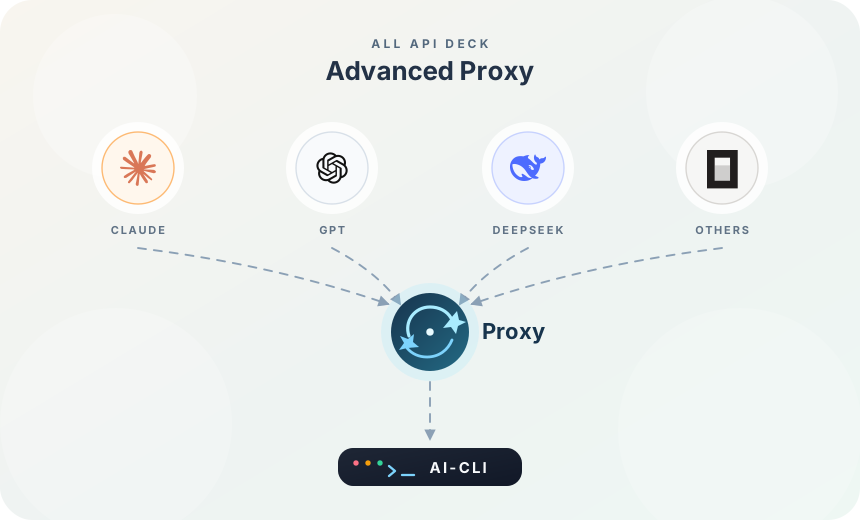
Advanced Proxy brings provider queues, protocol fallback, request logs, and connection records together. Clients keep using the local entrypoint while All API Deck chooses the provider and records the real exit.
- Select usable providers in the key vault and confirm the model.
- Enable the local proxy entry for Codex, Claude, OpenCode, or OpenClaw.
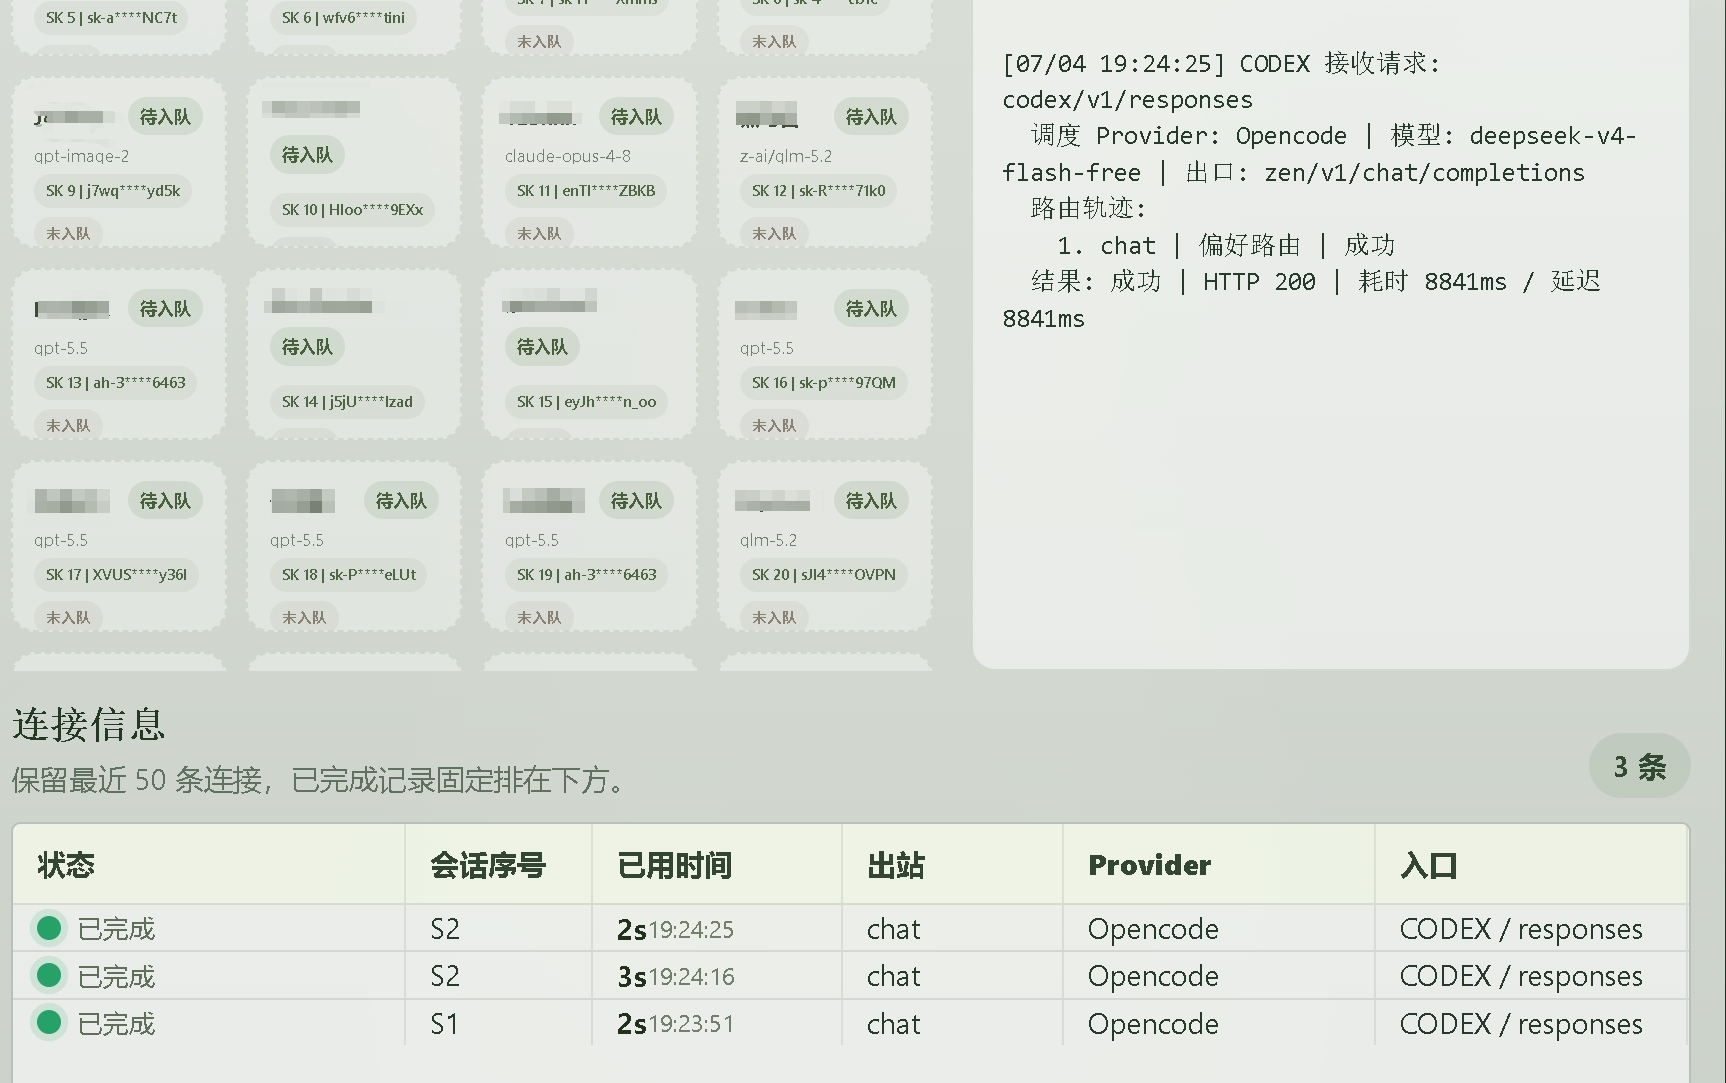
- Watch provider, model, exit URL, route trace, and HTTP result.
- Tune the provider queue using elapsed time, latency, and failure summaries.
Proxy capabilities
- Provider priority queues and automatic failover.
messages/responses/chat/completions多协议 fallback。- Protocol preference memory by host / key / model.
- Keep recent connections with status, session number, elapsed time, exit, provider, and entry.
Advanced proxy flow
Prompt-injection guard
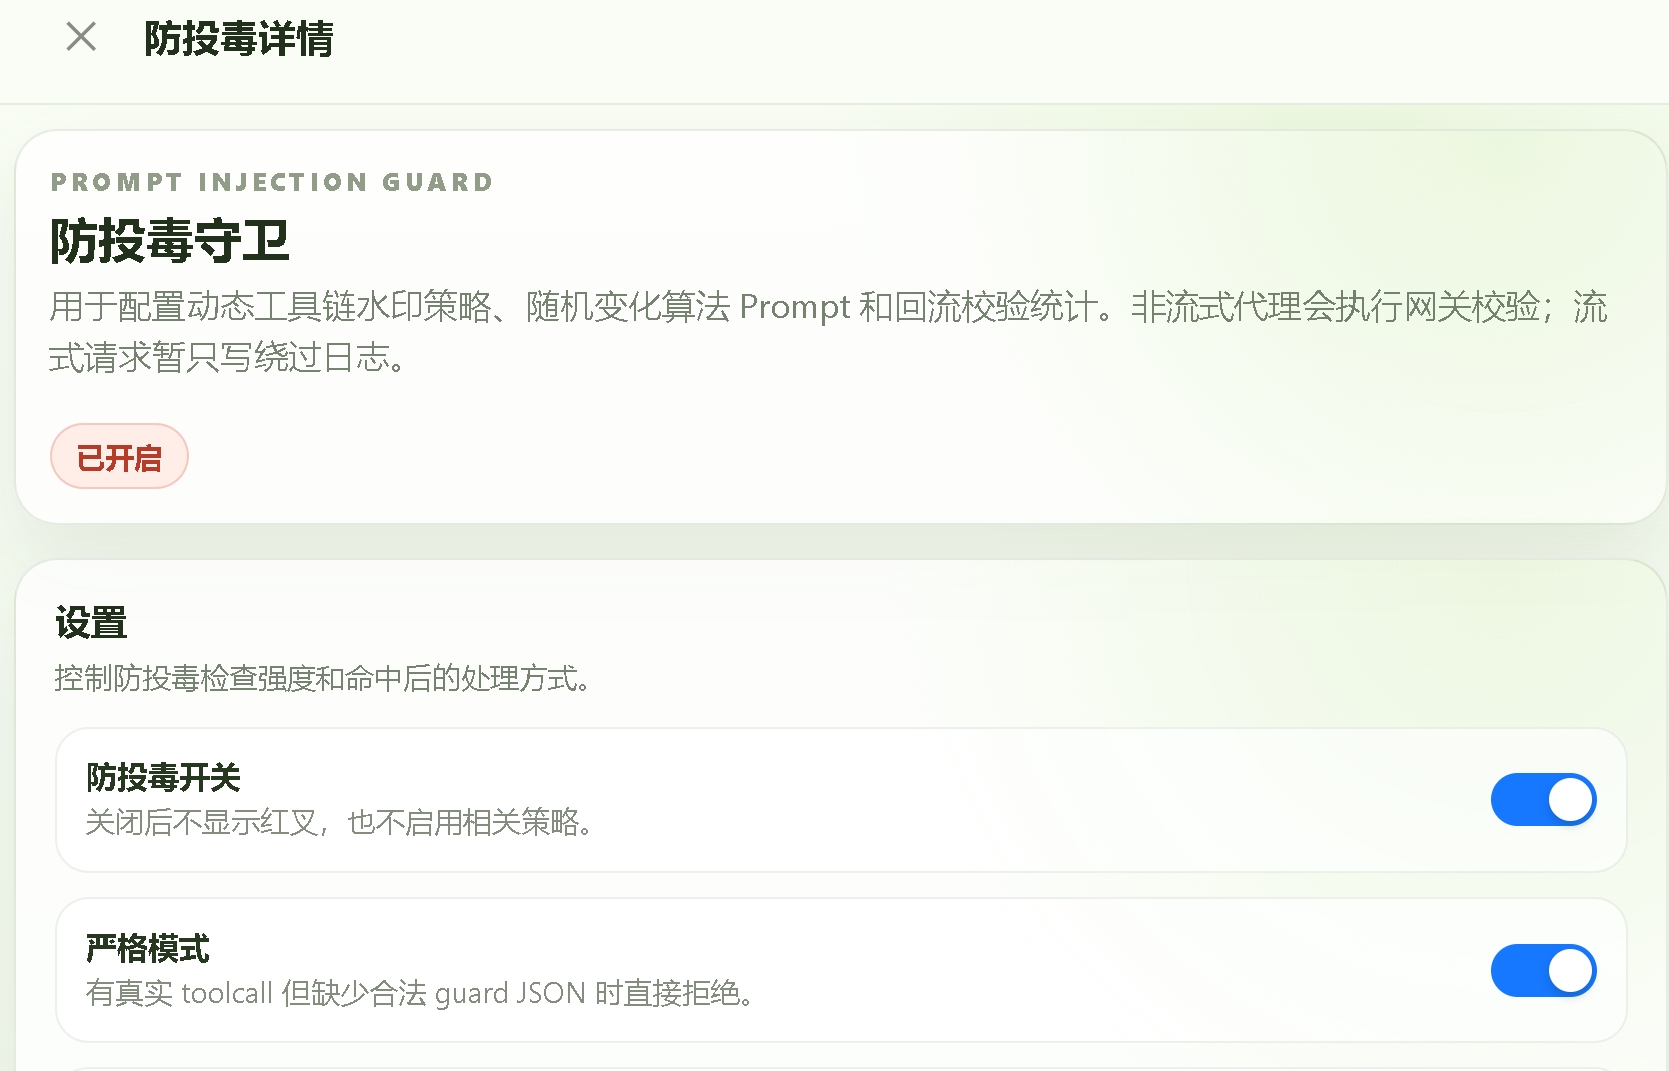
The guard configures dynamic toolchain watermarking, randomized algorithm prompts, and return-flow validation stats. Non-streaming proxy requests run gateway checks; streaming requests currently write bypass logs only.
- When the guard is off, no red cross is shown and related strategies are disabled.
- Strict mode rejects real toolcalls that lack legal guard JSON.
- Useful for client takeover and dynamic toolchain calls where prompt-injection risk matters.
Sidebar, miniBar, and floating windows
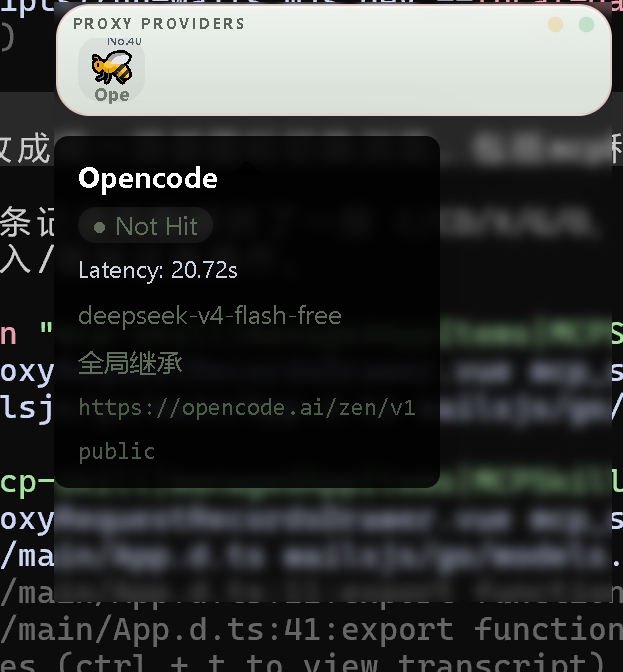
Sidebar / miniBar / floating windows let you keep observing scheduling state, organize call clusters, and run quick actions outside the main window. Mini floating is useful while coding or debugging clients.
- Inspect record state from the sidebar, miniBar, or floating window.
- Refresh one record, run quick checks, and switch models.
- Watch provider queues and live scheduling hits, then use proxy logs to locate slow requests or bad routing.

Local development and build
The desktop project lives under desktop/. Recommended environment: Windows 10/11, Go 1.24+, Node.js 24+, npm 11+, and WebView2 Runtime.
cd desktop
npm installnpm run dev
npm run dev:webnpm run build:desktop
npm run build:desktop-debug
npm run build:webRuntime log directories
- Windows:
%LOCALAPPDATA%\BatchApiCheck\runtime - macOS:
~/Library/Application Support/BatchApiCheck/runtime - Linux:
$XDG_STATE_HOME或$XDG_CACHE_HOME下的batch-api-check/runtime